在Hyper-V上使用Ubuntu
安装
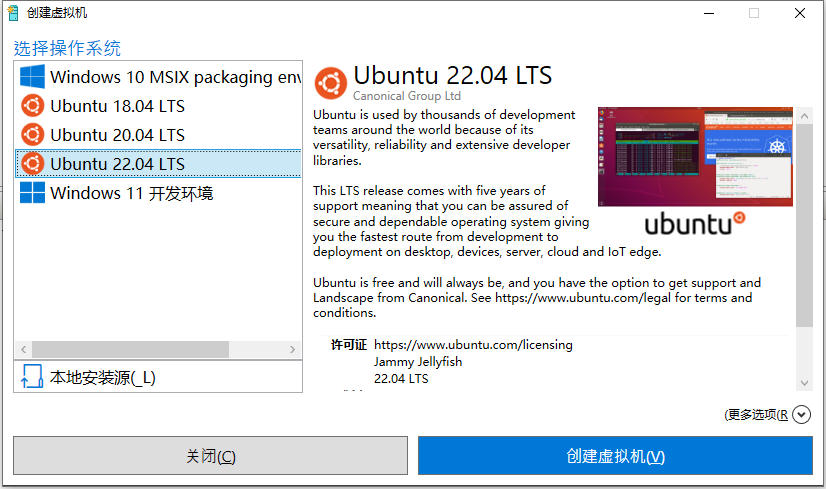
微软在Hyper-V的快捷创建(quick create)中内置了一些Ubuntu的发行版:

微软优化过的Ubuntu镜像与在Ubuntu官网下载的标准镜像有所区别,Ubuntu的这篇文章和微软的这篇文章简单的介绍了下。
如无特别需求,建议使用微软优化过的镜像。除了更方便外,体感上微软优化的镜像运行起来要更快一些。
增强模式
如果使用标准镜像,要打开增强模式的话需要做很多额外操作,可参见这篇gist。
微软之前使用了一个脚本来自动化这些操作,项目在linux-vm-tool,目前已经归档。只支持了Ubuntu 16.04和18.04。
热心网友Hinara分叉了这个项目,支持了Ubuntu 20.04和22.04。上面那篇gist里就是使用这个项目的脚本来安装增强模式的。
总结一下,使用ubuntu的标准镜像打开增强模式的步骤如下:
关闭自动登录
必须关闭自动登录,增强模式需要使用xrdp(x Remote Desktop Protocol)登录,而xrdp登录时需要输入密码。下载并运行脚本
1
2
3
4
cd ~/Downloads
wget https://raw.githubusercontent.com/Hinara/linux-vm-tools/ubuntu20-04/ubuntu/22.04/install.sh
sudo chmod +x install.sh
sudo ./install.sh
也可以直接clone整个项目,然后运行脚本
1 | cd ~/Downloads |
- 重启后,再次运行此脚本
很多攻略都漏掉了这一步,但这一步很重要,已经在脚本中有输出提示:A reboot is required in order to proceed with the install.
Please reboot and re-run this script to finish the install.
1 | sudo shutdown -r now |
重启后连接虚拟机,再次运行脚本
1 | cd ~/Downloads |
- 将虚拟机关机,在宿主机中设置Hyper-V传输类型
1 | sudo shutdown -h now |
使用Get-VM命令查看虚拟机名称
1 | > Get-VM |
再次连接到虚拟机,使用xrdp登录后即可使用增强模式。在控制条上可以切换基本会话和增强会话。
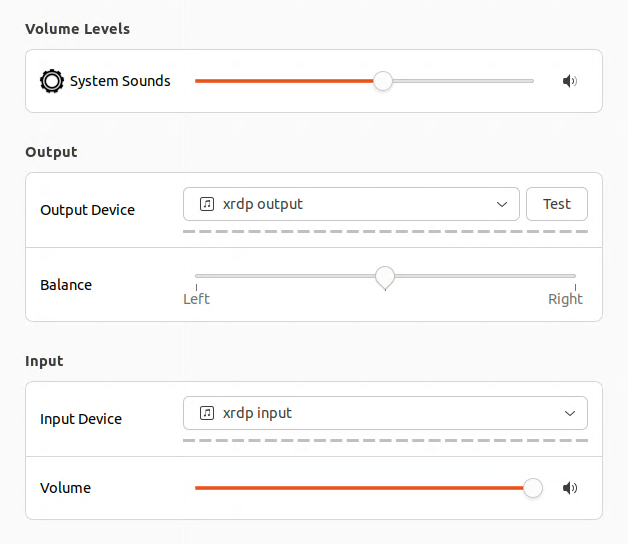
但似乎声音还是没有呢。
显示分辨率
默认Ubuntu的显示分辨率是1364 x 768,这个分辨率在现在的显示器上看起来很小。
基本会话
如果是使用的基本会话,可以修改grub来设置分辨率。
使用sudo nano /etc/default/grub将grub中的GRUB_CMDLINE_LINUX_DEFAULT改为
1 | GRUB_CMDLINE_LINUX_DEFAULT="quiet splash video=hyperv_fb:1920x1080" |
然后
1 | sudo update-grub |
增强会话
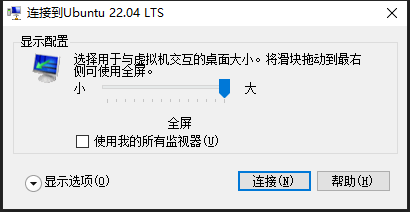
如果使用的xrdp,在连接时选择全屏就行。

声音
默认安装完后,无法将声音输出到宿主机。需要安装pulseaudio。可以参与ubuntu社区中的这篇帖子。
1 | sudo apt install build-essential dpkg-dev libpulse-dev git autoconf libtool |
在./scripts/install_pulseaudio_sources_apt_wrapper.sh这一步会花较长时间下载包,可以在日志文件中查看进度:
1 | tail -f /var/tmp/pa-build-suyu-debootstrap.log |

硬盘扩容
虚拟硬盘文件默认会放在C:\ProgramData\Microsoft\Windows\Virtual Hard Disks\,如果C盘空间不够可以挪到其它盘。在Hyper-V 设置中可以修改虚拟硬盘的默认文件夹。
有需求一定记得先扩容,否则创建完检查点就不允许编辑了。
先将虚拟机关机。
编辑硬盘驱动器的虚拟硬盘,官方内建Ubuntu镜像默认硬盘大小是12G,完全不够用。扩展至你想要的大小,这里是动态大小,大点没关系,比如200G。
只扩展虚拟硬盘文件并不会直接应用到Ubuntu系统,启动并连接虚拟机可以看到:
1 | user@ubuntu:~$ sudo fdisk -l |
还需要扩展分区。
1 | sudo apt install cloud-guest-utils |
注意/dev/sda 1中的1前面有个空格,这是分区号,不是分区名。
- 扩容完成
1
2
3
4
5
6
7
8
9user@ubuntu:~$ df -h
Filesystem Size Used Avail Use% Mounted on
tmpfs 192M 1.6M 190M 1% /run
/dev/sda1 194G 6.5G 188G 4% /
tmpfs 956M 0 956M 0% /dev/shm
tmpfs 5.0M 4.0K 5.0M 1% /run/lock
/dev/sda15 105M 5.3M 100M 5% /boot/efi
tmpfs 192M 84K 192M 1% /run/user/127
tmpfs 192M 172K 191M 1% /run/user/1000
远程登录
Ubuntu桌面版默认是不支持远程登录的,为了可以从宿主机使用ssh命令登录虚拟机,需要安装openssh-server。
1 | sudo apt install openssh-server |
使用ip addr查看虚拟机的IP地址,然后在宿主机使用ssh命令登录。
也可直接使用ssh user@ubuntu这种形式,user为用户名,ubuntu为虚拟机中ubuntu的电脑名。
嵌套虚拟化
我们可以在Hyper-V虚拟机上再运行一个Hyper-V虚拟机。
1 | Set-VMProcessor -VMName <VMName> -ExposeVirtualizationExtensions $true |