Android的可展开式通知

搬运自codeversed

可扩展通知

Android 4.1给我们提供了更强大的功能,如可展开式通知和操作按钮。我们可以使用丰富的样式,甚至创建自定义的可展开式通知。在尺寸和布局上都有足够的灵活度来创建完美的可展开式通知。

NotificationManager

安卓的通知是通过Notification类来创建的。在使用它之前需要先使用正确的Context来获得NotificationManager,Context由使用场景决定,可以是activity,也可以是service。

1
NotificationManager notificationManager = (NotificationManager) getSystemService(NOTIFICATION_SERVICE);

Builder相关类

Notification.Builder – 这个类在Android 3.0 Honeycomb [API 11]被添加。所以如果想支持更老的安卓版本,得换成老掉牙的NotificationCompact。

NotificationCompat.Builder – 这个类在Support Library v4中被定义(适配Android 1.6+)。

NotificationCompact.Builder像其它builder类一样,提供了创建Notification对象的接口。可以使用PendingIntent来指定点击后的intent行为。PendingIntent就像一个token,用SetCotentIntent方法来传给builder。如果需要一些额外的行为,比如收到邮件通知后想直接回复,可以通过builder的addAction方法来添加三个额外的行为。一旦你完成了Notification的构建,下一步你会看到它是如何被调用的。

为了正确的处理交叉进程,我们可以考虑使用Android Support Library v4中的TaskStackBuilder类。

Notification views

Normal View – A notification in normal view appears in an area that’s up to 64 dp tall. Even if you create a notification with a big view style, it will appear in normal view until it’s expanded.

1. Content title
2. Large icon
3. Content text
4. Content info
5. Small icon
6. Notification time

Big View – A notification’s big view appears only when the notification is expanded, which happens when the notification is at the top of the notification drawer, or when the user expands the notification with a gesture. Expanded notifications were first introduced in Android 4.1 JellyBean [API 16]. Expandable notifications were designed to support rich notification style objects called Notification.Style.

7. Details area

Creating Notifications

Normal View

One point to remember is that all notification objects, including a Normal View, are required to have a small icon, a title, and detail text.

1
2
3
4
5
6
7
8
9
10
11
12
13
14
15
16
17
18
19
20
21
22
23
// Creates an explicit intent for an ResultActivity to receive.
Intent resultIntent = new Intent(this, ResultActivity.class);

// This ensures that the back button follows the recommended
// convention for the back key.
TaskStackBuilder stackBuilder = TaskStackBuilder.create(this);

// Adds the back stack for the Intent (but not the Intent itself)
stackBuilder.addParentStack(ResultActivity.class);

// Adds the Intent that starts the Activity to the top of the stack
stackBuilder.addNextIntent(resultIntent);
PendingIntent resultPendingIntent = stackBuilder.getPendingIntent(
0, PendingIntent.FLAG_UPDATE_CURRENT);

// Create the final Notification object.
Notification myNotification new NotificationCompat.Builder(this)
.setSmallIcon(R.drawable.ic_launcher)
.setAutoCancel(true)
.setLargeIcon(remote_picture)
.setContentIntent(resultPendingIntent)
.setContentTitle("Normal Notification")
.setContentText("This is an example of a Normal Style.").build();

Big View

You will use this style the most when setting up expandable notifications. This Notification.Style class contains three direct subclasses which are:

Big Text Style – Displays a large text block to show the user more details on the item at hand.
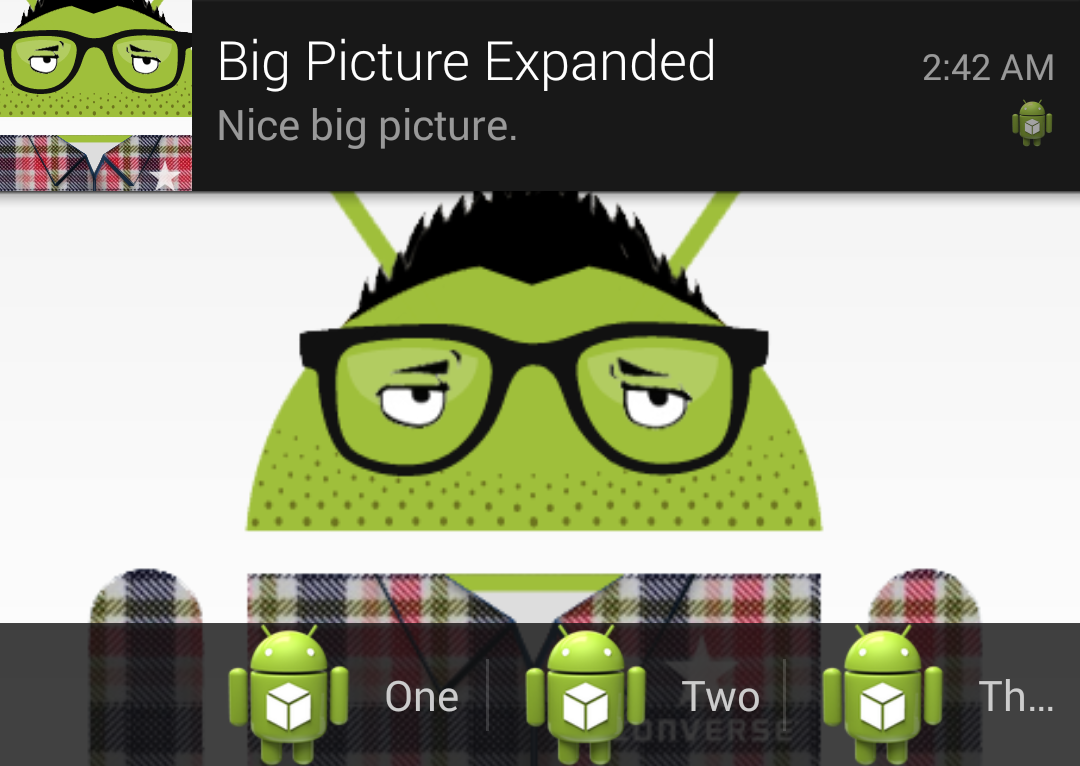
Big Picture Style – Displays a bitmap up to 256 dp tall similar to a screenshot notification.
Inbox Style – Displays rows of text like a listView similar to the Gmail notification for multiple emails.
To apply a rich notification style to the notification, you first need to create the style object itself. For this example I am showing you the BigPictureStyle subclass.

1
2
3
4
5
6
7
8
9
10
11
12
13
14
15
16
17
18
19
20
21
22
23
24
25
26
27
28
29
30
31
32
33
34
35
36
37
38
39
40
41
Bitmap remote_picture = null;

// Create the style object with BigPictureStyle subclass.
NotificationCompat.BigPictureStyle notiStyle = new
NotificationCompat.BigPictureStyle();
notiStyle.setBigContentTitle("Big Picture Expanded");
notiStyle.setSummaryText("Nice big picture.");

try {
remote_picture = BitmapFactory.decodeStream(
(InputStream) new URL(sample_url).getContent());
} catch (IOException e) {
e.printStackTrace();
}

// Add the big picture to the style.
notiStyle.bigPicture(remote_picture);

// Creates an explicit intent for an ResultActivity to receive.
Intent resultIntent = new Intent(this, ResultActivity.class);

// This ensures that the back button follows the recommended
// convention for the back key.
TaskStackBuilder stackBuilder = TaskStackBuilder.create(this);

// Adds the back stack for the Intent (but not the Intent itself).
stackBuilder.addParentStack(ResultActivity.class);

// Adds the Intent that starts the Activity to the top of the stack.
stackBuilder.addNextIntent(resultIntent);
PendingIntent resultPendingIntent = stackBuilder.getPendingIntent(
0, PendingIntent.FLAG_UPDATE_CURRENT);

Notification myNotification new NotificationCompat.Builder(this)
.setSmallIcon(R.drawable.ic_launcher)
.setAutoCancel(true)
.setLargeIcon(remote_picture)
.setContentIntent(resultPendingIntent)
.setContentTitle("Big Picture Normal")
.setContentText("This is an example of a Big Picture Style.")
.setStyle(notiStyle).build();

Custom View

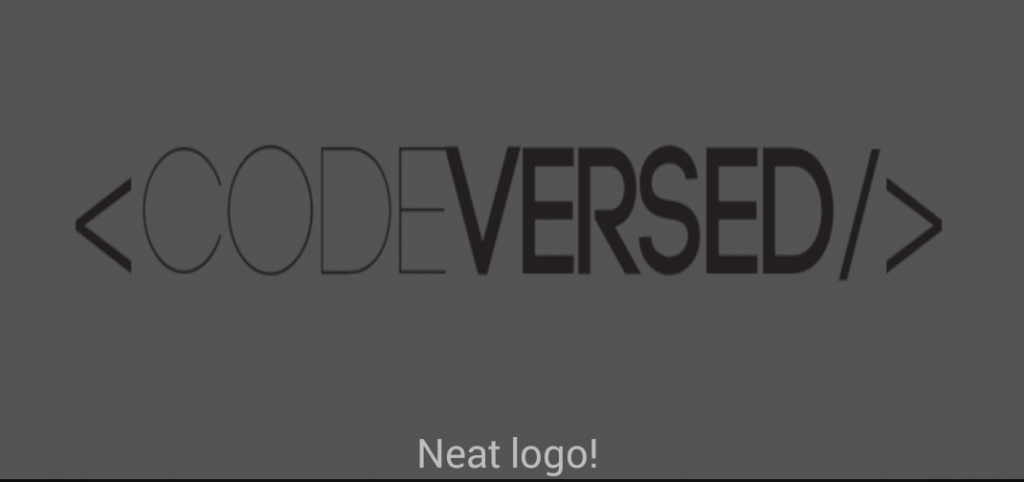
So what if the rich notification styles don’t provide you with the layout you need? Easy, just create your own layout and pass it to the builder. One little fact to retain is that notifications use remote views, which means you need to create a layout using a RemoteView. Below is exactly how you would need to create this custom RemoteView. When using a custom view, it will still function like the other expandable notifications we talked about.

First you need to create your layout file, here is one for an example.

1
2
3
4
5
6
7
8
9
10
11
12
13
14
15
16
17
18
19
<?xml version="1.0" encoding="utf-8"?>
<LinearLayout xmlns:android="http://schemas.android.com/apk/res/android"
android:layout_width="match_parent"
android:layout_height="match_parent"
android:orientation="vertical"
android:background="#545454"
android:gravity="center_horizontal">

<ImageView
android:layout_width="wrap_content"
android:layout_height="wrap_content"
android:background="@drawable/codeversed_logo"
android:contentDescription="@string/codeversed_logo"/>

<TextView
android:layout_width="wrap_content"
android:layout_height="wrap_content"/>

</LinearLayout>

Next create the RemoteView that uses your custom layout and apply it RemoteView using bigContentView.

1
2
3
4
5
6
7
8
9
10
11
12
13
14
15
16
17
18
19
20
21
22
23
24
25
26
27
// Creates an explicit intent for an ResultActivity to receive.
Intent resultIntent = new Intent(this, ResultActivity.class);

// This ensures that the back button follows the recommended
// convention for the back key.
TaskStackBuilder stackBuilder = TaskStackBuilder.create(this);

// Adds the back stack for the Intent (but not the Intent itself)
stackBuilder.addParentStack(ResultActivity.class);

// Adds the Intent that starts the Activity to the top of the stack.
stackBuilder.addNextIntent(resultIntent);
PendingIntent resultPendingIntent = stackBuilder.getPendingIntent(
0, PendingIntent.FLAG_UPDATE_CURRENT);

// Create remote view and set bigContentView.
RemoteViews expandedView = new RemoteViews(this.getPackageName(),
R.layout.notification_custom_remote);
expandedView.setTextViewText(R.id.text_view, "Neat logo!");

Notification notification = new NotificationCompat.Builder(this)
.setSmallIcon(R.drawable.ic_launcher)
.setAutoCancel(true)
.setContentIntent(resultPendingIntent)
.setContentTitle("Custom View").build();

notification.bigContentView = expandedView;

Source Code

示例代码